Point Of Interests (POI)
Point of interests also known as POIs are a way to add and share information about locations. You can add information and attachments like images, PDF-documents or even embed webpages inside POIs.
Create POI
To create a POI you can right click on the location you want to create the POI and selecting Create POI.
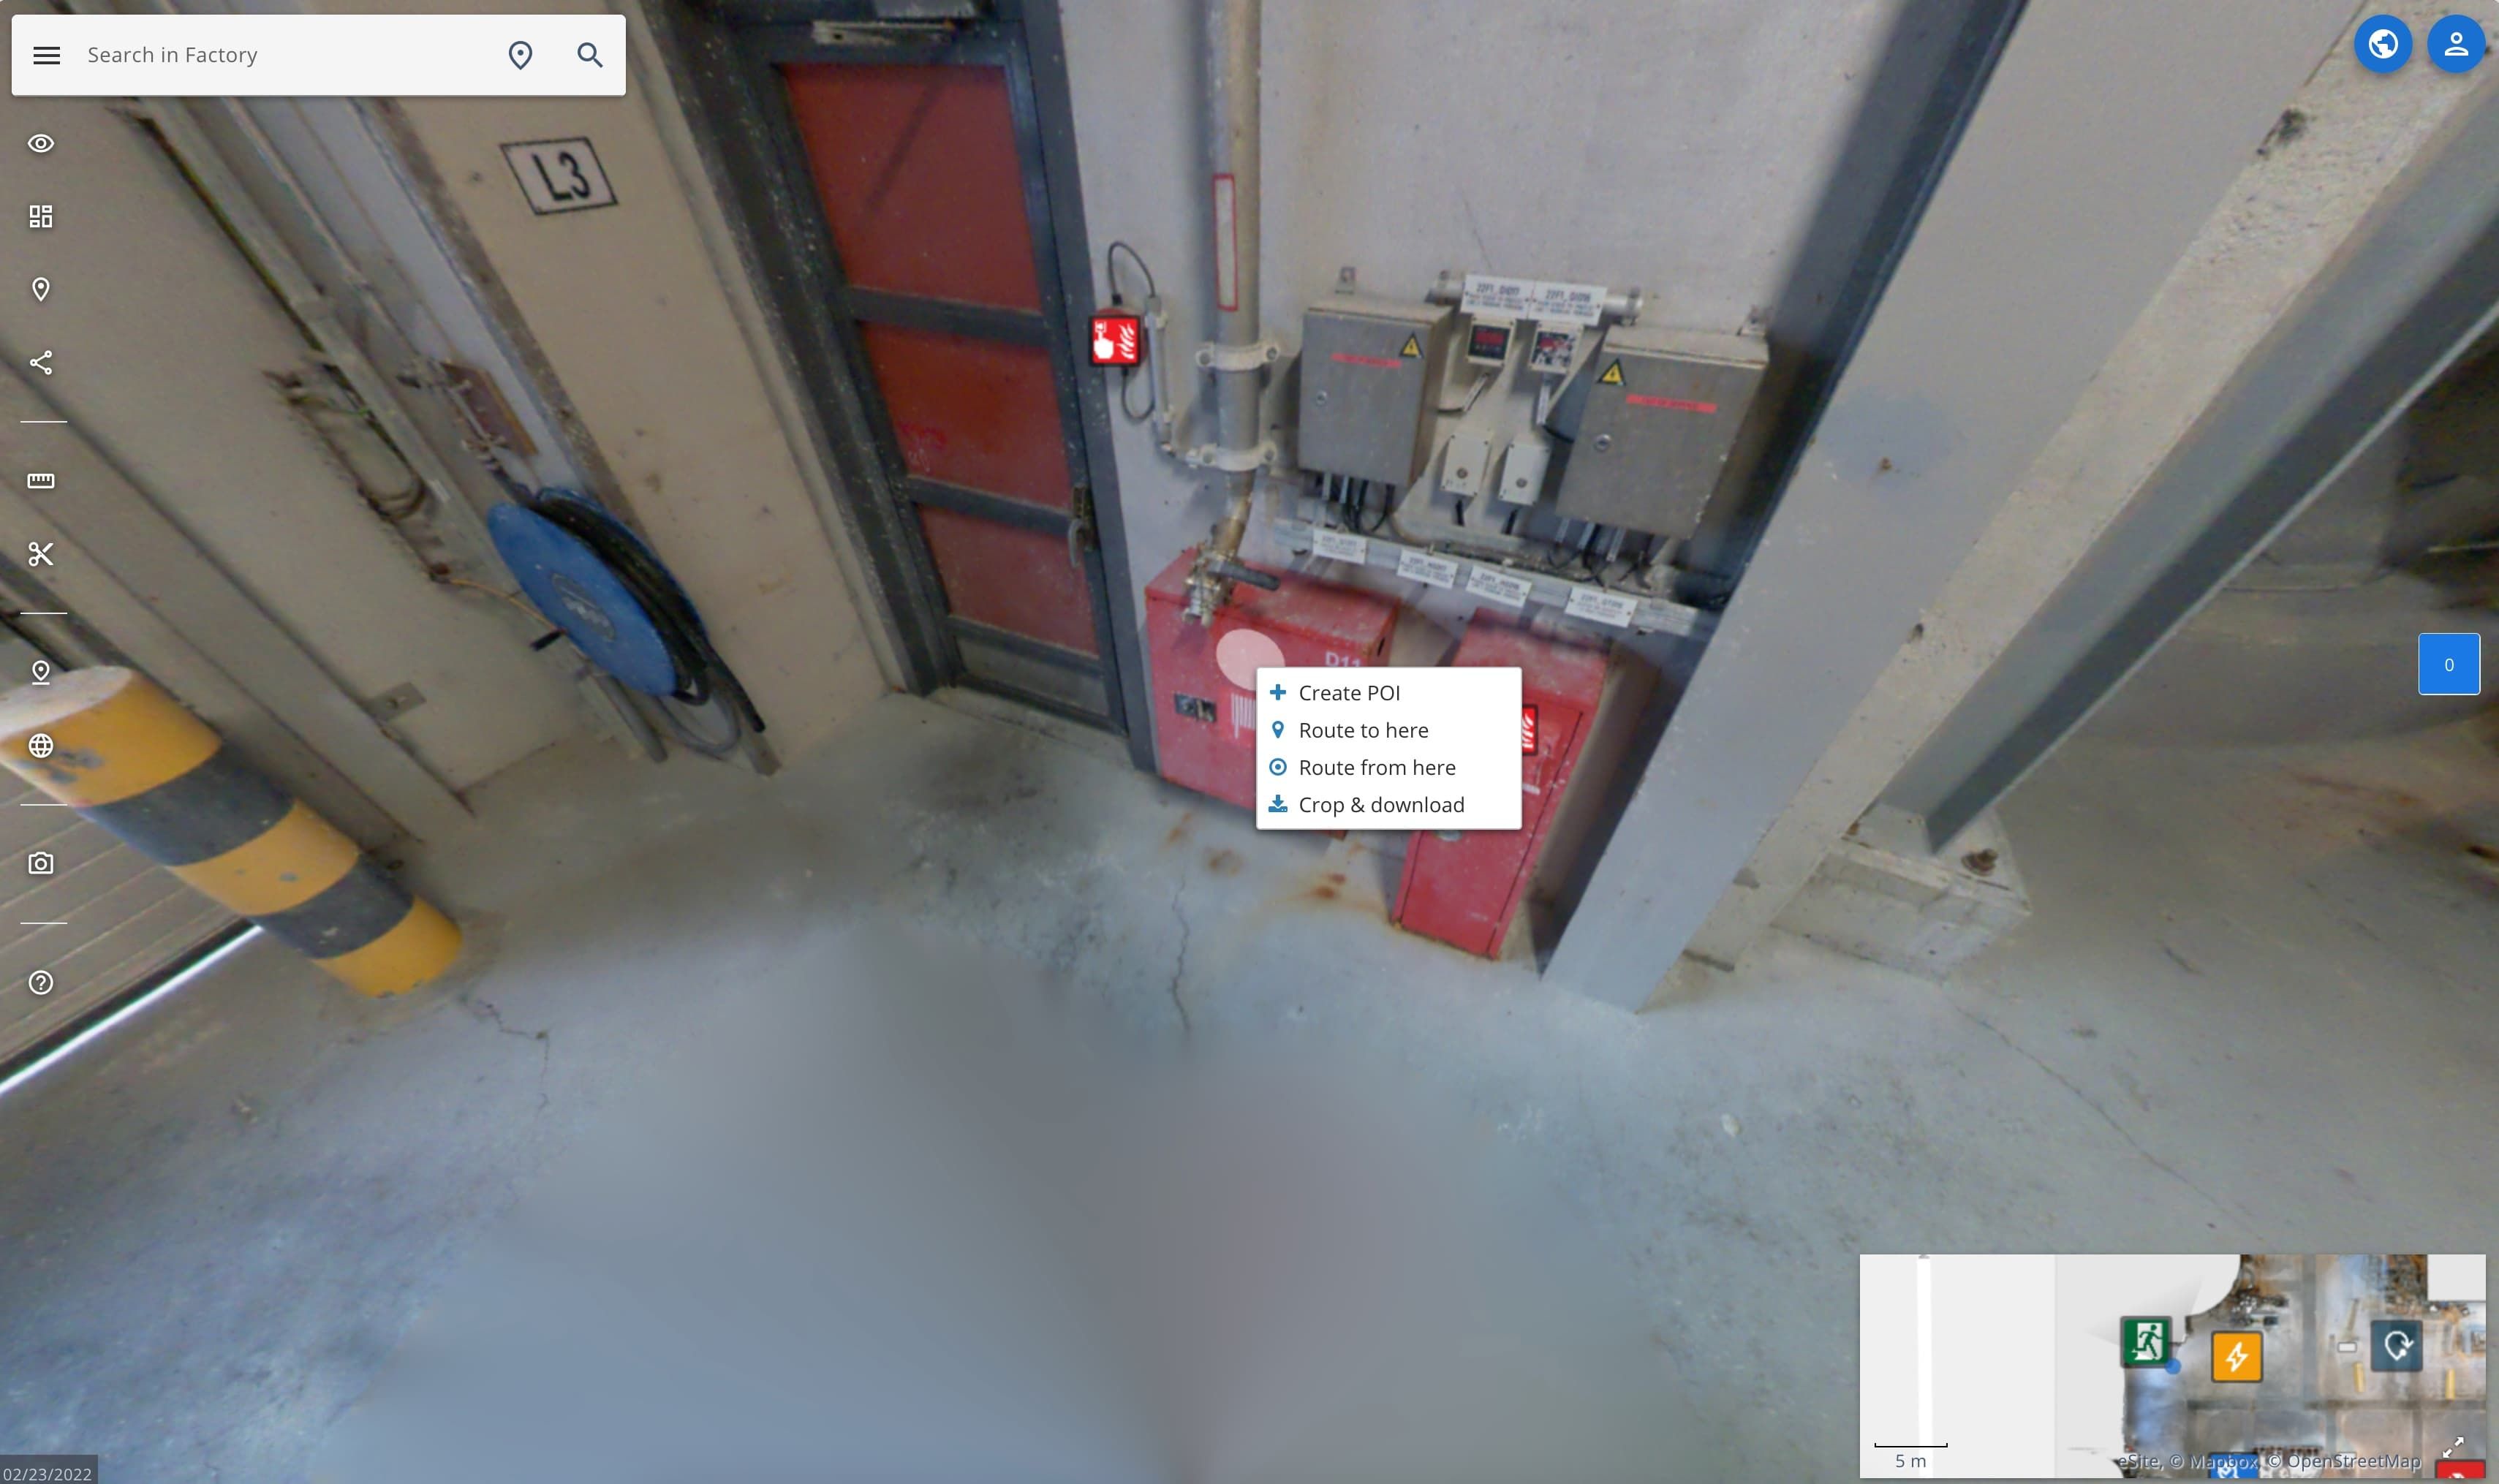 On a touchscreen device, tap and hold on the location to create a POI.
Edit POI
To add information about the POI, let's go trough all of the fields.

Fields with * are required.
| Field | Description |
|---|---|
| Name | Name of the POI. |
| Category* | Category of the POI. You can use one of the default ones, or create new ones, see POI Categories. |
| View configuration | • Use current: uses the current view in the panoramas when POI is created or edited. :br• Use closest panoramix image: uses the most closest panoramic image looking at the POI. |
| View | Select the lowest user group rank can see the POI. |
| Edit | Select the lowest user group rank can edit the POI. |
| Editor | Add text, media etc. to the description. Use the Add media button to attach files. |
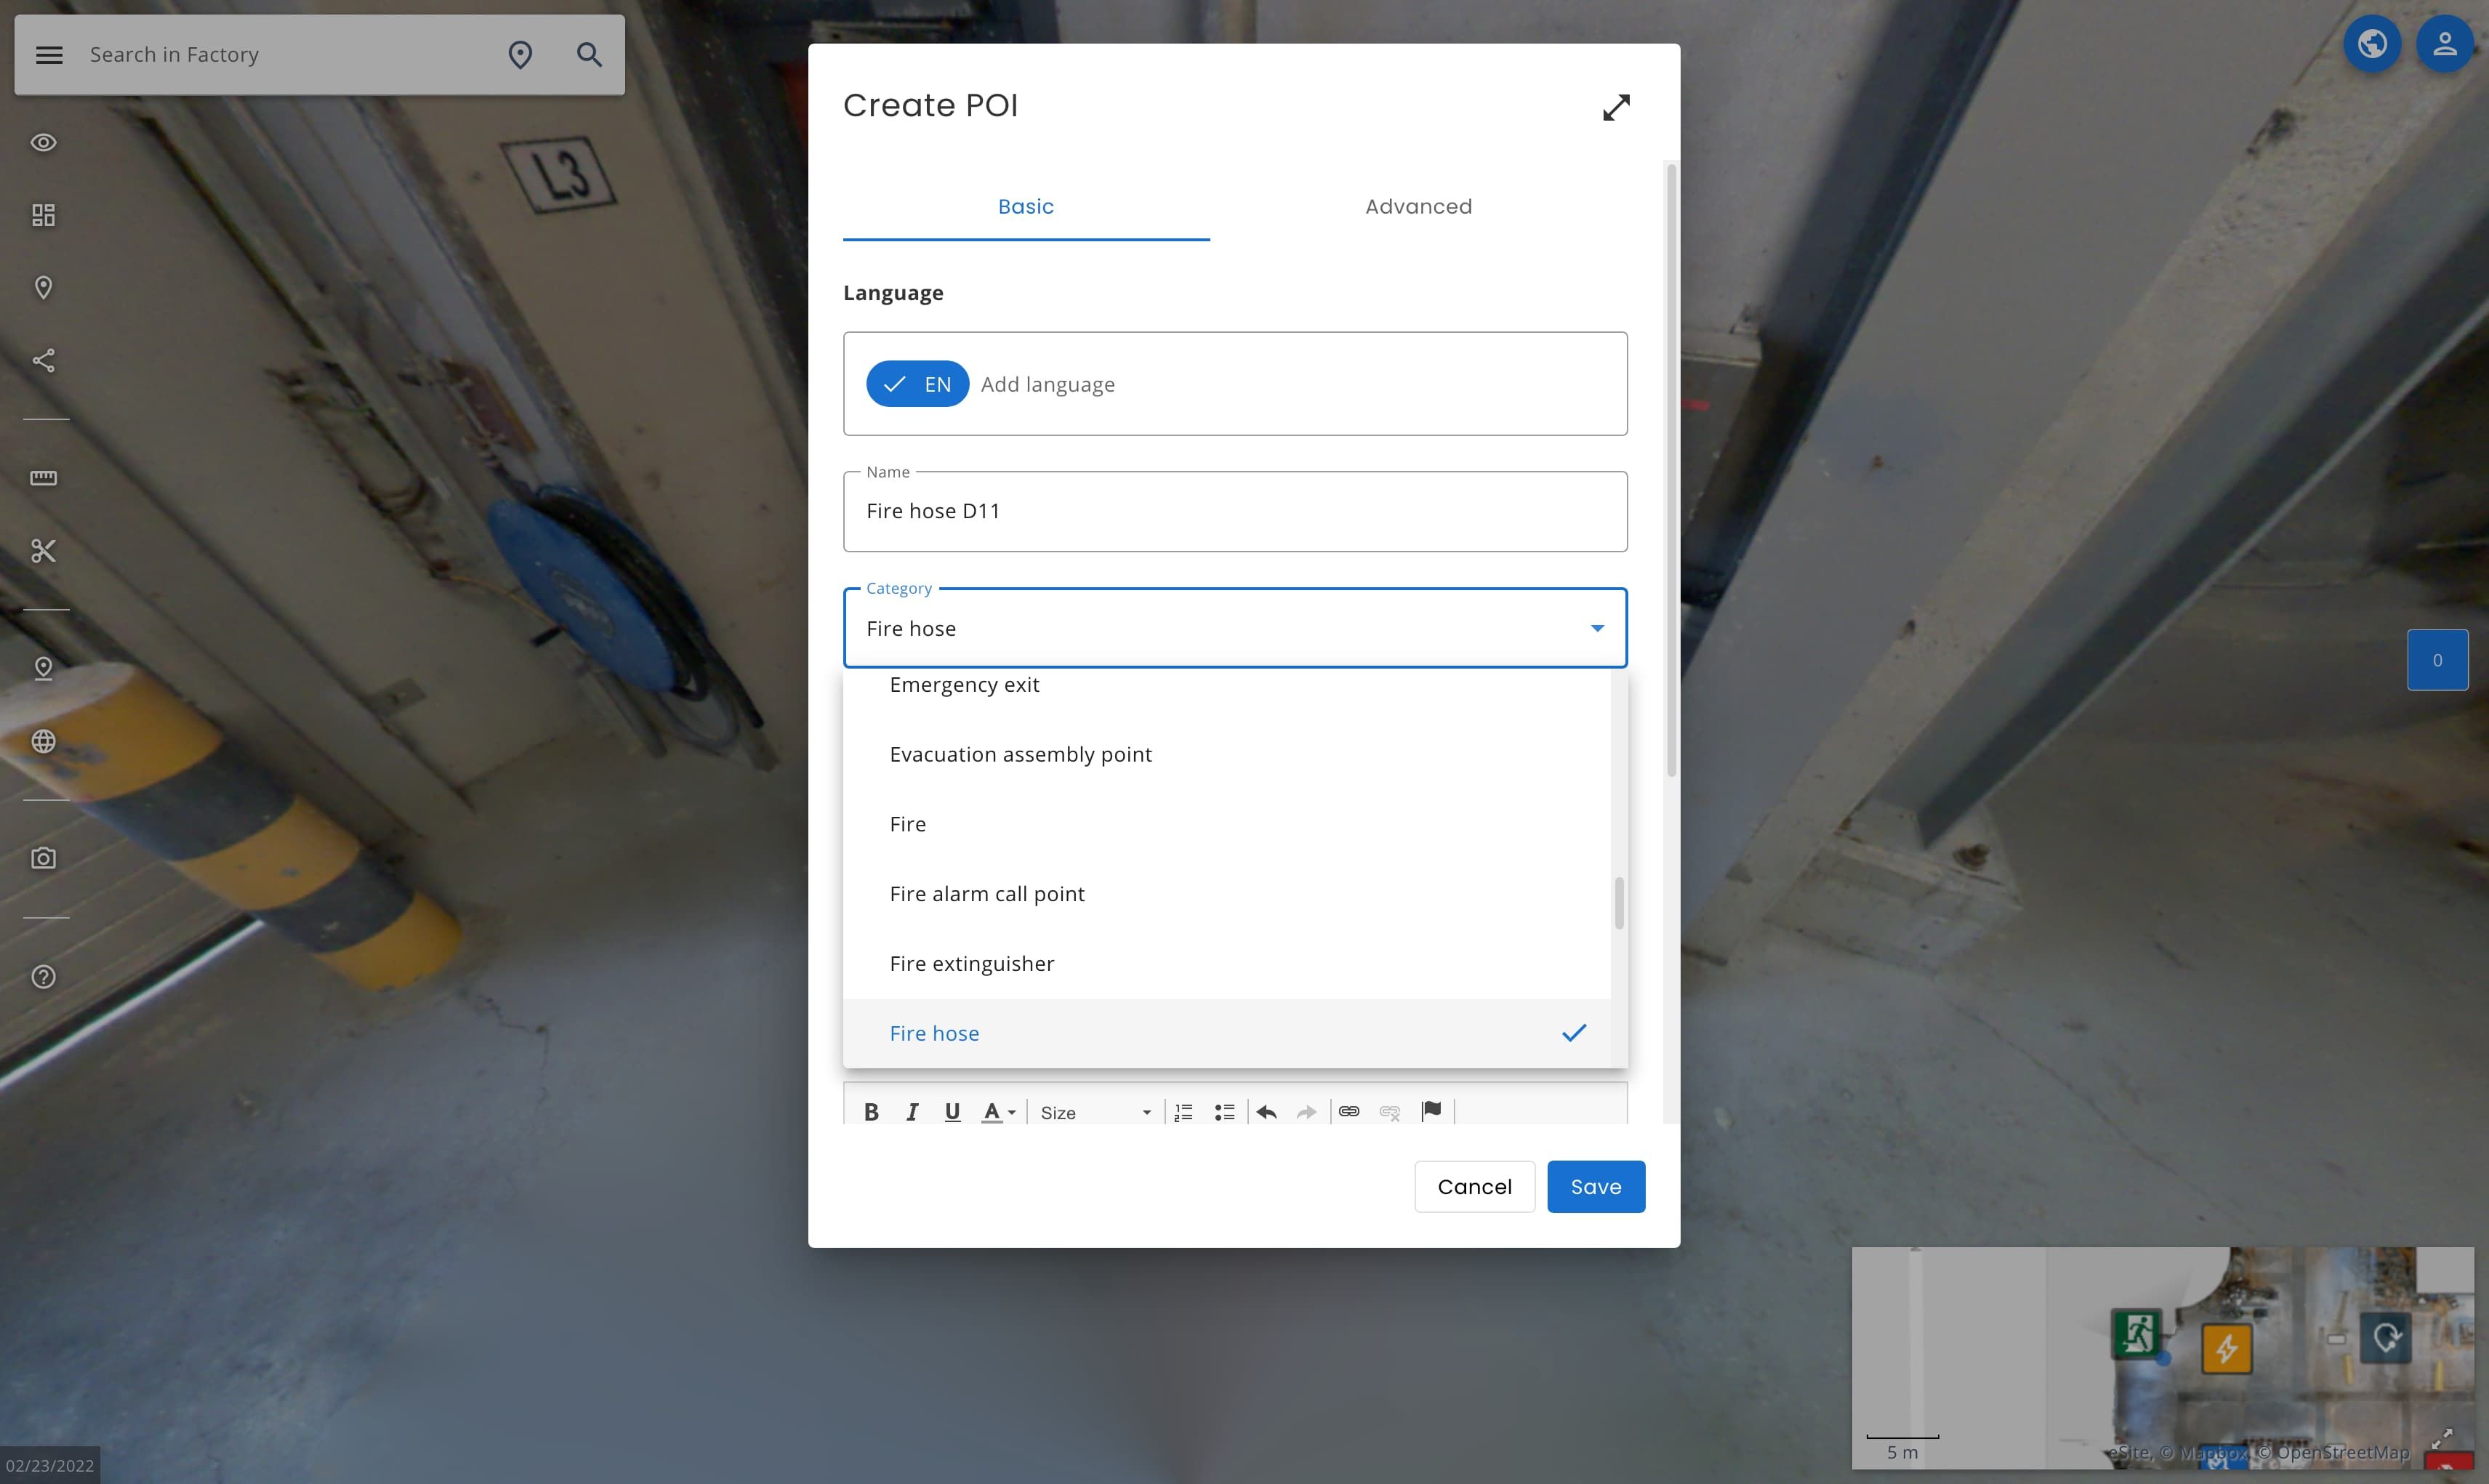
In this example let's create a POI for this fire hose:
We add a name for it, in this case Fire hose D11. Select the category for the POI, in this case we use Fire hose. To create new categories, see POI Categories.
Let's leave the view configuration to Use current view. We want the POI to be visible for all users, so let's change the view to Viewer.
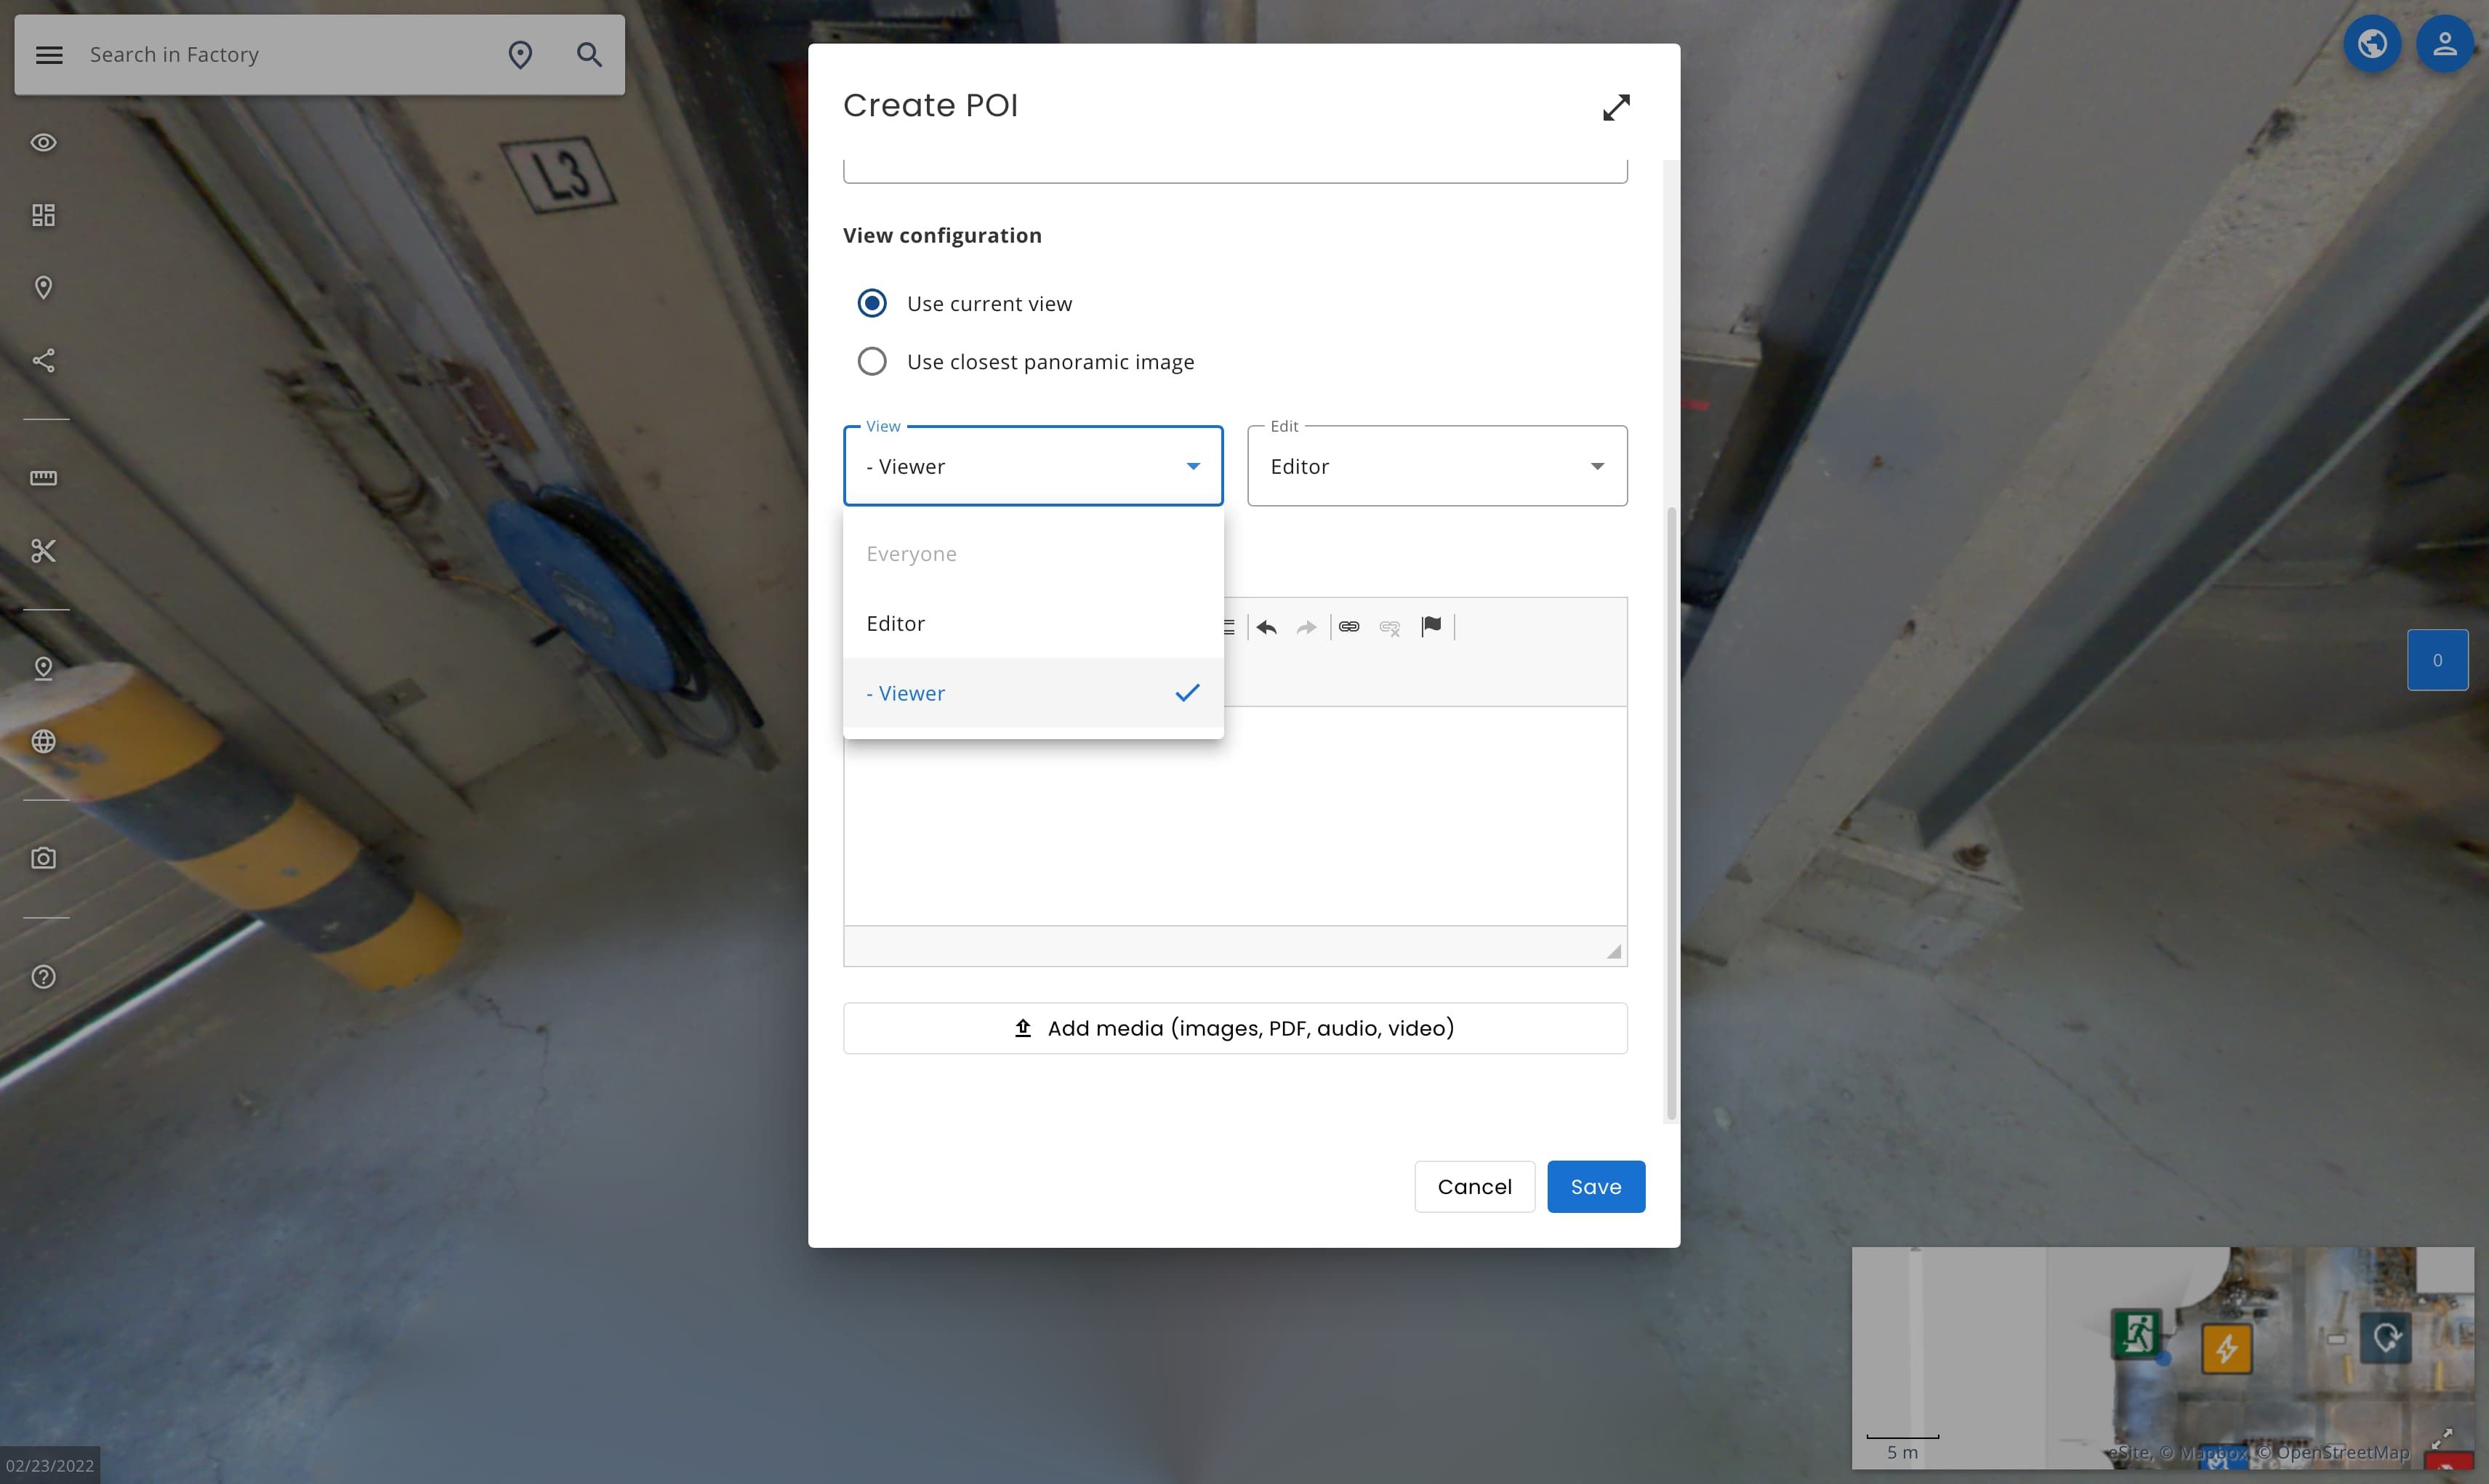
Let's add something to the description. You can add text, media etc. to here. This time we will add a text Next inspection 6/2026. When you are ready click Save.

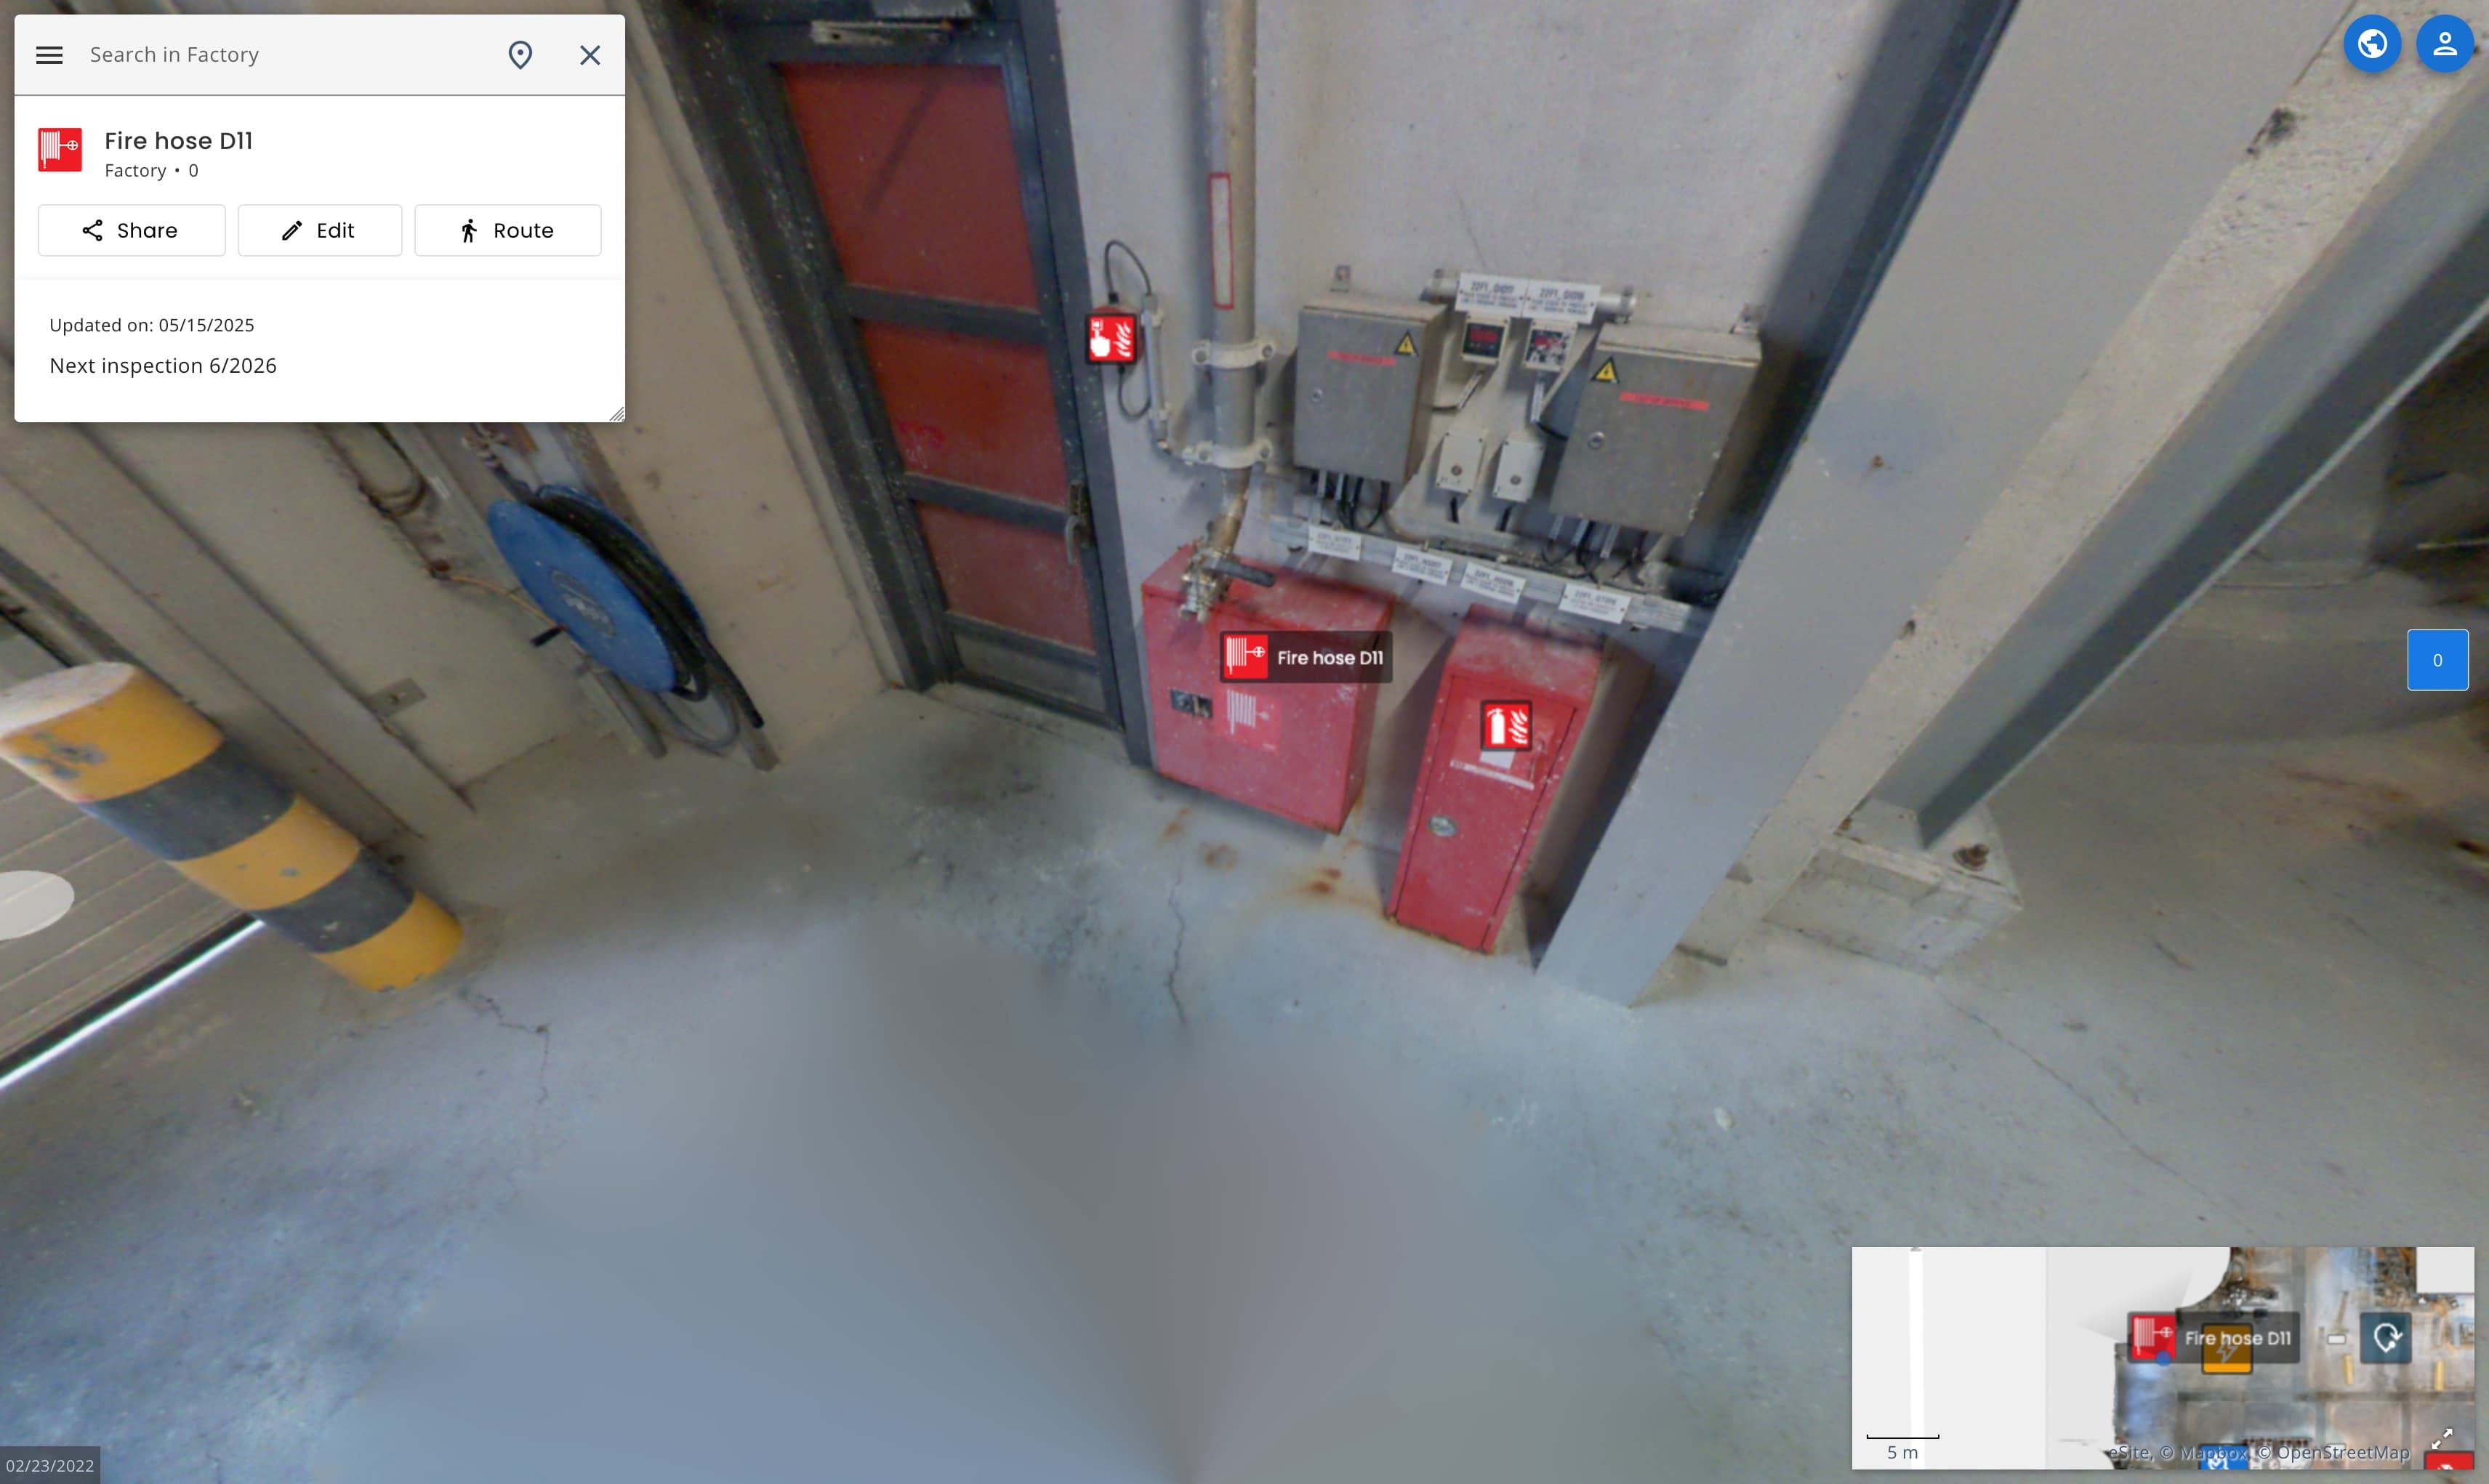
And now the POI is created and will look like this when open:
Delete POI
To delete a POI:
- Open the POI you want to remove.
- Click on Edit.
- Select Delete.
- Confirm deletion.
POI is now deleted and it will no longer be visible.
Move POI
To move a POI to a new location:
- Open the POI you want to move.
- Click on Edit.
- Select Move.
- Select a new location from panorama view, and use the left click to select new location.
- Do not worry if it goes to the wrong location at first click, you can move it again with left mouse click. Final location needs to be saved.
- Confirm (or cancel) new location from bottom of the POI panel.
POI is now saved to a new location.
View/Hide POIs
To hide and view POIs from the view without deleting them:
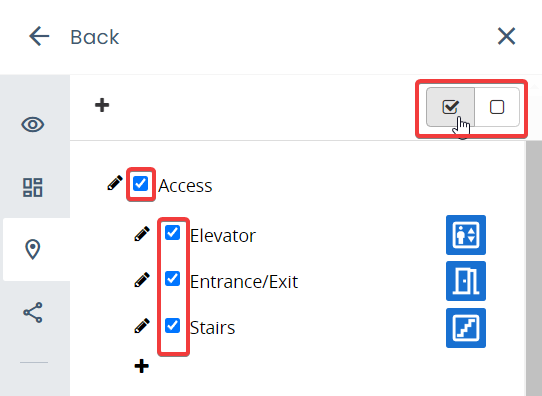
- Select POI Types from the left sidebar.
- Use the checkmarks to view/hide categories.
- To view/hide all POIs use the Select all / Deselect all buttons under the close icon.
POI Categories
POI categories are a useful way to categorize POIs based on what they are. If you are not able to see the editing features, you do not have the permissions to create or edit categories. Request permissions from your site admin.
Add POI category group
POI category group is a general group where different categories can be created.
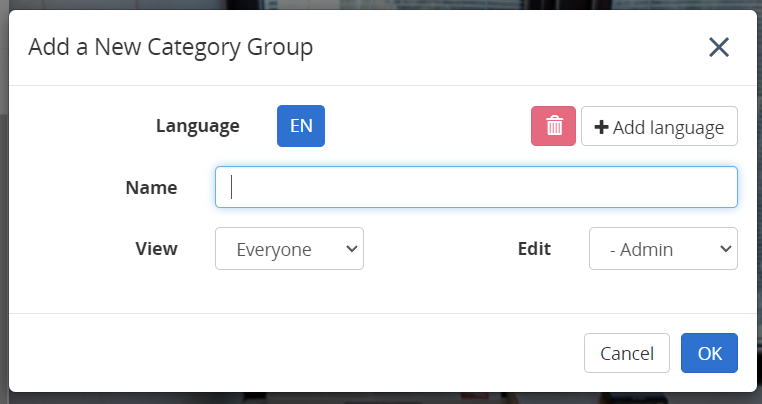
- Select POI Types from the left sidebar.
- Select + (Add a new category group)

- Give the category a name and view/edit rights.
Add POI category
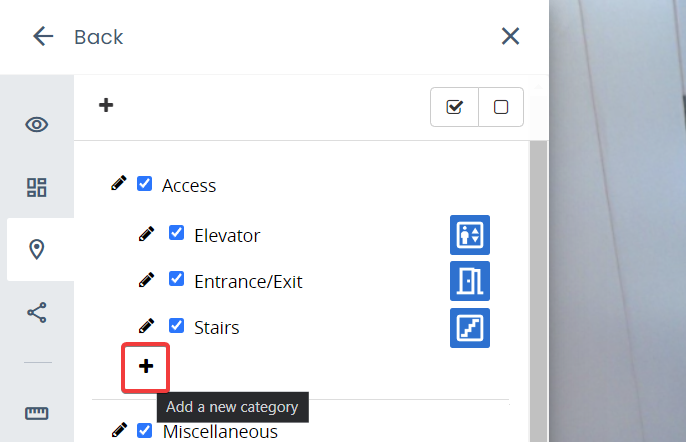
- Select POI Types from the left sidebar.
- Select + (Add a new category)
- Select category group
- Name the category
- Upload custom icon. Supported image sizes are: 32x32, 64x64, 128x128, 256x256.
- Leave zoom visibility settings empty if you do not wish to give custom values.
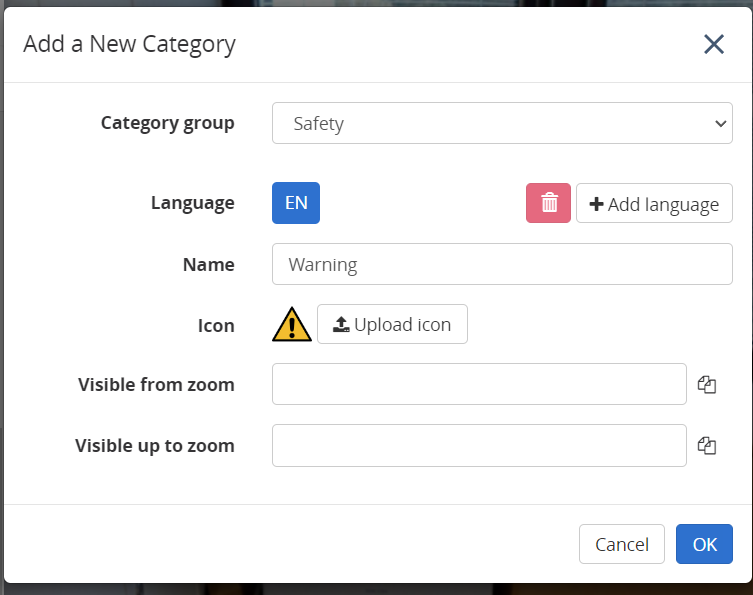
- Click OK to save.
Edit POI category
- Select POI Types from the left sidebar.
- Select pen icon on the category you wish to edit.
- Edit the information.
- Save with OK.
Remove POI category
- Select POI Types from the left sidebar.
- Select Pen icon on the category you wish to delete.
- Click on Delete.
- Confirm deletion.
Advanced editing of POIs
There is still an couple of features for more advanced editing of POIs:
Multi language
You can make your POIs and POI categories with multiple languages.
Add language
- Edit POI or POI category and click on + Add language.
- Select language.
- Now enter the name and description with the selected language.
- You can change between languages by clicking on the language above Name field.
Remove language
- Edit POI or POI category and click on select the language you want to remove.
- Click on the red trash can icon.
- Save with Save.
Advanced tab on POI edit
Here you can give custom data, custom attributes and custom icon for POI. Remember to save with Save.
POI Linking (Tour)
Create links between POIs to move between them.
To add a Next or Previous button to the POI panel follow these instructions:
- Open the POI you want to be as the next or previous
- Copy the number after
poi=from the link in your browser's address bar - Go to the POI or create the POI you want to create the button
- Edit POI -> Advanced -> Custom attributes
- To create a previous button, enter `prev_poi` as Key and the copied POI number to the Value field. Remember to click the + to add the value
- To create a next button, enter `next_poi` as Key and the copied POI number to the Value field. Remember to click the + to add the value
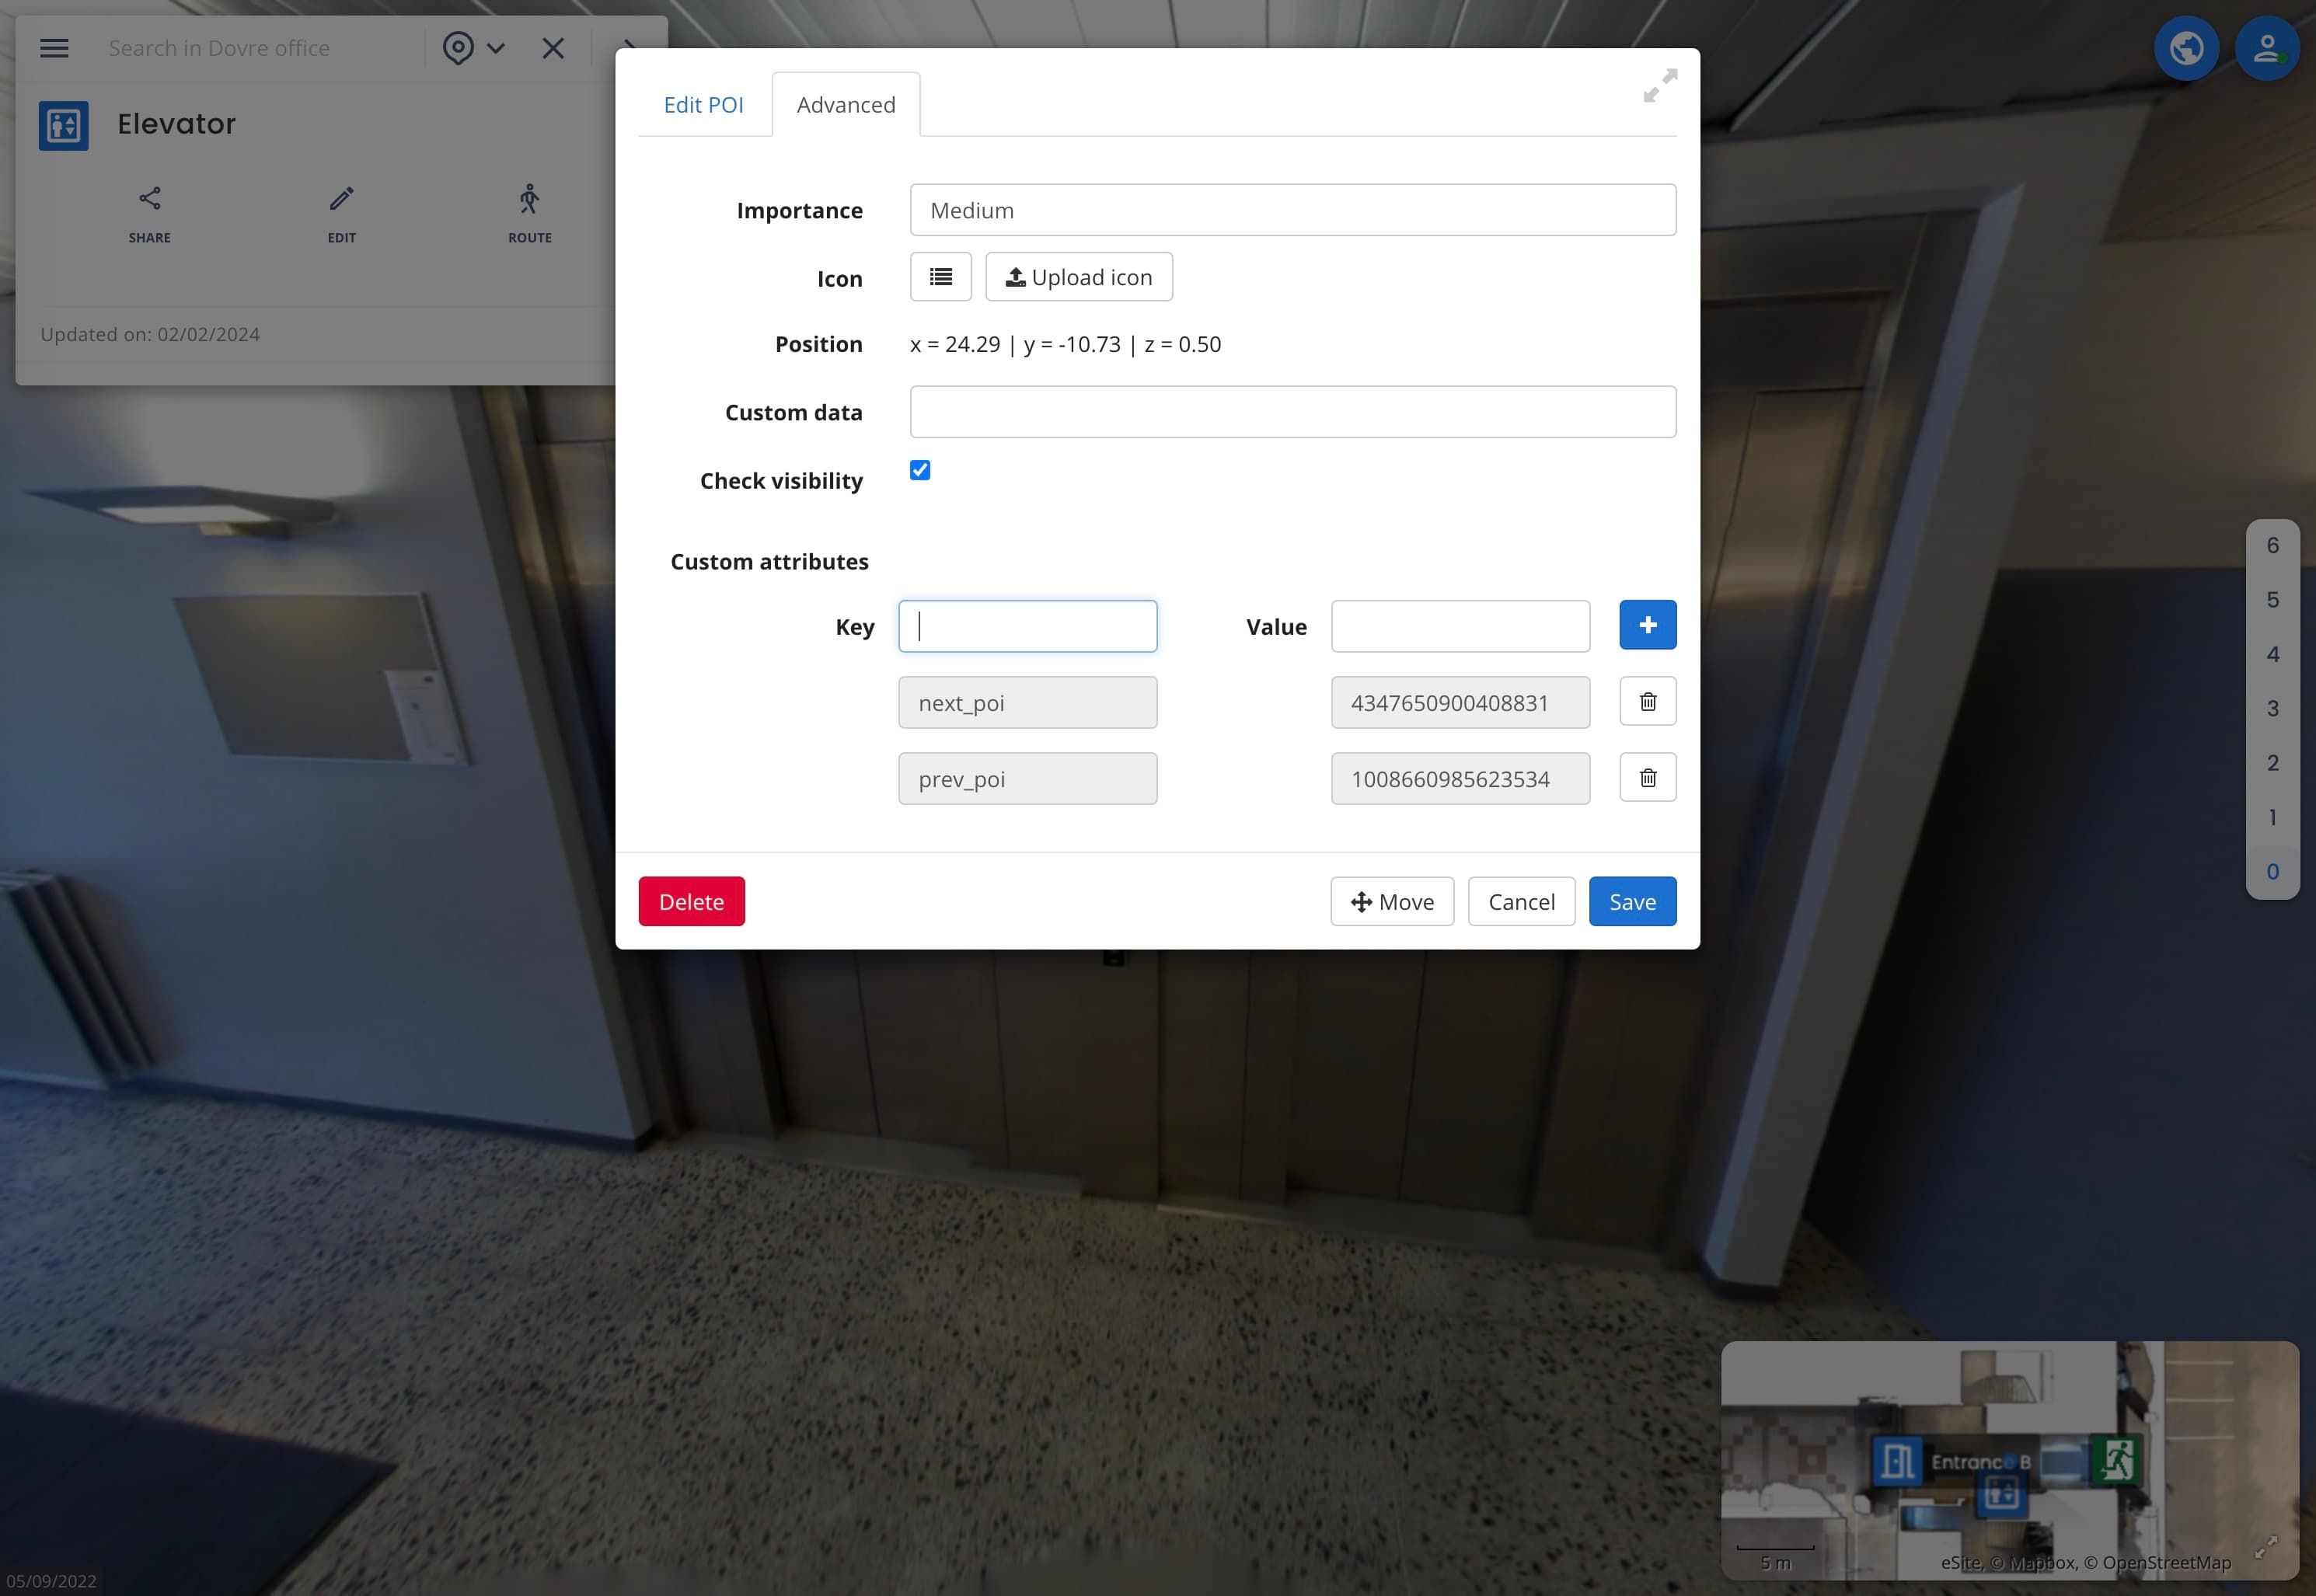
- Click save to save the POI
- The buttons should appear automatically to the POI panel
Other custom POI buttons
Route to POI
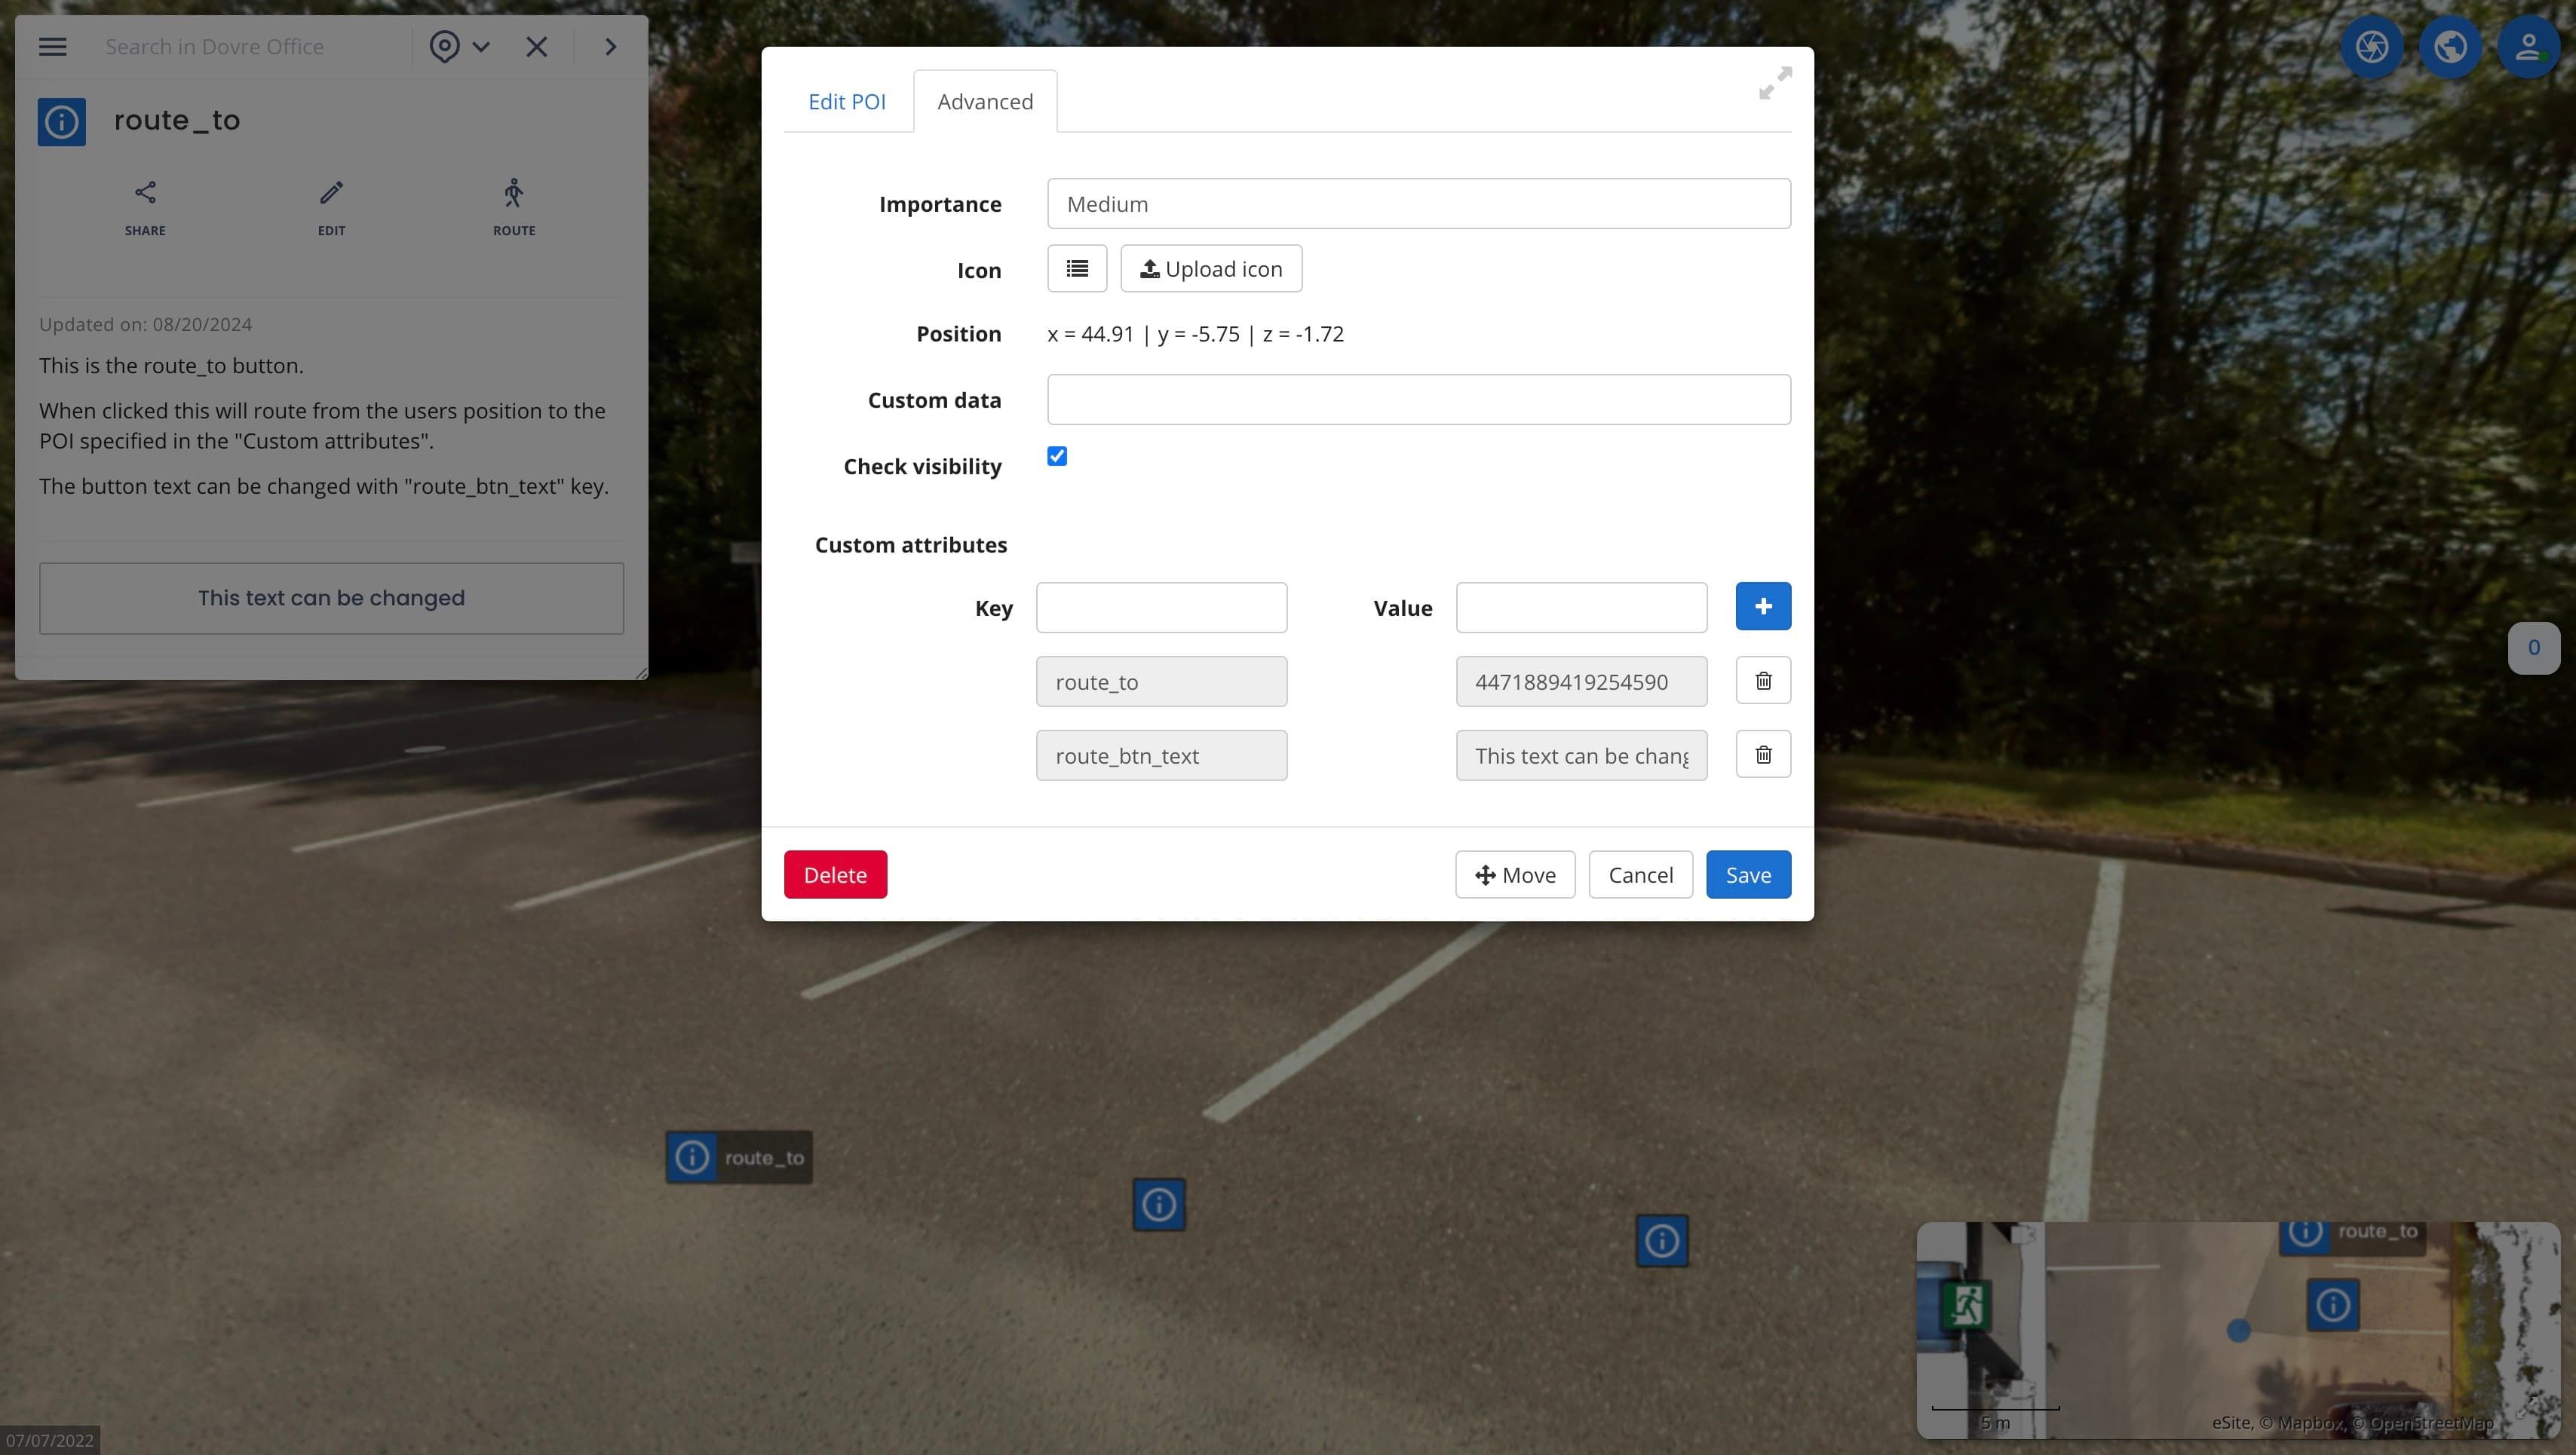
With route_to attribute you can add a button to the POI panel that will route from the users position to the POI specified in the value.
To add a button follow these instructions:
- Open the POI you want to be as the poi to be routed to
- Copy the number after
poi=from the link in your browser's address bar - Go to the POI or create the POI you want to create the button to
- Edit POI -> Advanced -> Custom attributes
- Enter `route_to` as Key and the copied POI number to the Value field. Remember to click the + to add the value
- Enter
route_btn_textas Key and any text as a value to change the text inside the button. - Click save to save the POI
- The button should appear automatically to the POI panel
Go to POI
With go_to_poi attribute you can add a button to the POI panel that go to the POI specified in the value.
To add a button follow these instructions:
- Open the POI you want to be as the poi to be routed to
- Copy the number after
poi=from the link in your browser's address bar - Go to the POI or create the POI you want to create the button to
- Edit POI -> Advanced -> Custom attributes
- Enter `go_to_poi` as Key and the copied POI number to the Value field. Remember to click the + to add the value
- Enter
go_to_btn_textas Key and any text as a value to change the text inside the button. - Click save to save the POI
- The button should appear automatically to the POI panel
